
Upstairs Progress
Here is the upstairs foyer wall, when we bought the house.
Here is the view of the original upstairs foyer, as you go up...

Now.... for the progress!
7/2/05 -- Last weekend, Jeff and Randy cut a whole in the upstairs ceiling, to the 3rd floor. (With it, 148 years of dust came down, but that's a whole different story!)
Here is the plan Jeff made for supporting the hole.

And here is the hole...


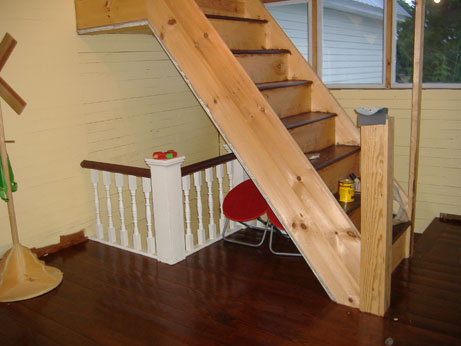
This past week, we have been using the Shop-Vac up in the attic, trying to get rid of all of that caked on dust, and all of the dead carcasses/owl pellets/etc left behind by the owl family. And, it's probably 150 degrees up there. Fun, fun! This weekend, construction has begun on the 3rd floor stairs, that are located in the upstairs foyer- making a stair well. These stairs needed to be put in before the hardwood floors are installed in the upstairs foyer.
Jeff designed a box to be hung from the 3rd floor joists. Our top 2 stairs will be angled towards the center of the house, because the ceilings in the attic are angled in.
Here is the box design. The top 2 stairs will be at diagnals...

Here is the actual box!

Here are the plans for the stairs...

And here they are...


The plan is to trim these stairs to match the bottom ones, including having Holly spin matching spindles on the lathe!
We also put in the support column. This will be boxed in and match the posts on the downstairs staircase. This will really help keep the floor from sagging (any more).


7/17/05 -- Here's where Jeff has started trimming up the stairs. It also shows the hardwood floors!


4/6/06-- As of now, the stairs are being trimmed, the floors are finished, and the original rails have been carefully pieced back together, which could have only been done with Ray's (previous owner and fellow masochist) meticulous labeling for the directions of each little piece!


12/27/06-- Jeff and Randy have begun flooring the other bedroom upstairs (off the foyer, to the left). We have to box in around the chimney, and decided to frame up for a faux fireplace. We found this great antique mantel that will work perfectly!


1/7/07 -- We now have a vision for the new room! We picked out a natural stone for the hearth, which will also be used for the front of the fireplace.


In the corners, we found a great decorative tile... we will put one in each of the four corners.


We are on a desperate search for a "summer cover" (a decorative cover made of cast iron or metal that covered the opening of the fireplace when not in use), but haven't had any luck so far. Here is an example of one that we liked...

Here are some shots of what will be my half bath!


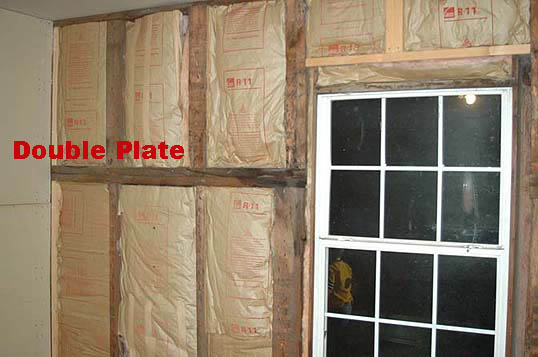
The room has given us some clues into the house's history. In the front wall, there is a double plate. The house is balloon framed... which makes Jeff think that this section of the house used to be a story and a half at one time. It is possible that the house began as two houses that were connected- back before the Victorian porch was added. Of course, we don't have any pictures before the one shown, so who knows! In the photo, there is something that made us curious... the windows in the upstairs bedroom used to start at the floor, and were immediately to each side of the chimney. The windows are now higher and further from the chimney. This supports the "story and a half" theory.


The house predates our county, so we will have to try to search the neighboring county for the house's history. You know, because we have so much time on our hands...
Here's a bit on Balloon Framing from Wikipedia:
Balloon Framing is a method of wood construction used primarily in Scandinavia, Canada and the United States. In the U.S., this method was introduced by Augustine Taylor (1796-1891) in Chicago. It utilizes long continuous framing members (studs)that run from sill to eave line with intermediate floor structures nailed to them. Once popular when long lumber was plentiful, balloon framing has been largely replaced by platform framing.
The curious name of this framing technique was originally a derisive one. As Taylor was constructing his first such building, St. Mary's Church, in 1833, skilled carpenters looked on at the comparatively thin framing members, all held together with nails, and declared this method of construction to be no more substantial than a balloon. It would surely blow over in the next wind! Though the criticism proved baseless, the name stuck.
Although lumber was plentiful in 19th century America, skilled labor was not. The advent of cheap machine-made nails, along with water-powered sawmills, in the early 19th century made balloon framing highly attractive, because it did not require highly-skilled carpenters, as did the dovetail joints, mortises and tenons required by post-and-beam construction. For the first time, any farmer could build his own buildings without a time-consuming learning curve.
It has been said that balloon framing populated the western United States and the western provinces of Canada. Without it, western boomtowns certainly could not have blossomed overnight. It is also a fair certainty that, by radically reducing construction costs, balloon framing improved the shelter options of poorer North Americans.
The main difference between platform and balloon framing is at the floor lines. The balloon wall studs extend from the sill of the first story all the way to the top plate or end rafter of the second story. The platform-framed wall, on the other hand, is independent for each floor.

1/13/06 -- We found it! Here is the fireplace insert that we will use!!!


1/27/07 - I have
learned to appreciate something over the past 3 years of living here.... CLOSET
SPACE. Right now, we have one tiny closet under the stairs and a little closet
in the living room (the current location of our bedroom). The boys have a
chefrobe and we do, too (although I haven't gotten Jeff motivated enough to put
a ROD in it).
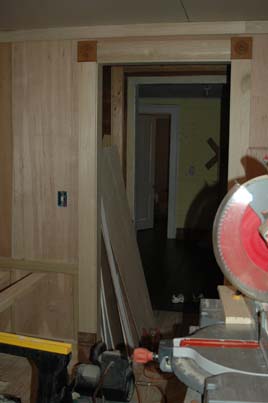
The upstairs linen closet is now a reality! The little hallway is shaping up,
and the bedroom that we have been working on has WALLS! There have been rooms in
this house which we have ripped up just to put back... and this room is not one
of those. Like the kitchen, we have never seen this room with walls. or a floor.
The upstairs bedroom had gaps where wind would rush in and you heard nature as
if you were standing in a tree. No longer! It sounds like a house in there...
like a real room... it is quiet(ish)! There is now sheetrock up, although it
will be covered when we put up the panels. Here are pics:
View from foyer--

Inside the closet -

Inside the room looking out -


Fireplace Shaping Up -

2/20/07 - Jeff has been working on getting the panelling up in the bedroom... and it is coming along nicely! All of the wood here is different colors and different woods for the simple reason that we got it all for CHEAP at Southern Surplus. It will all be painted in the end.


Each panel will
have trim around the inside.... like this...


Oh, and Jeff flexes his "Daddy muscles" with the miles and miles of leftover scrap from the trim...
Homemade Lincoln Logs - From scraps used to fix up a house made when Lincoln was actually president...

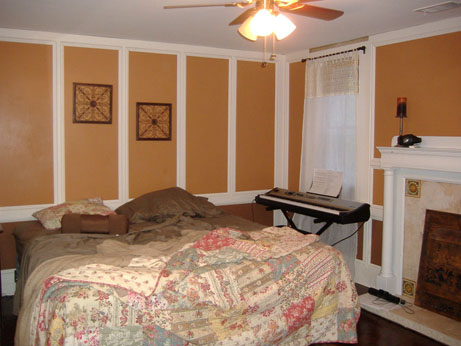
3/24/07 -- We have paint! This only has one coat up, and no trim paint yet... but check it out!


4/22/07 -- Whew! This room has a lot of trim. Geez.


7/4/07 -- I've finished the floor...


I've also painted the upstairs foyer and put another coat of polyurethane on the foyer floor.
12/31/2007 -- We have been working on the half bath. The tile is in, the ceiling tiles are in, and the walls have been caulked and painted. We are working on turning this marble-topped washstand into a vessel sink and cabinet.


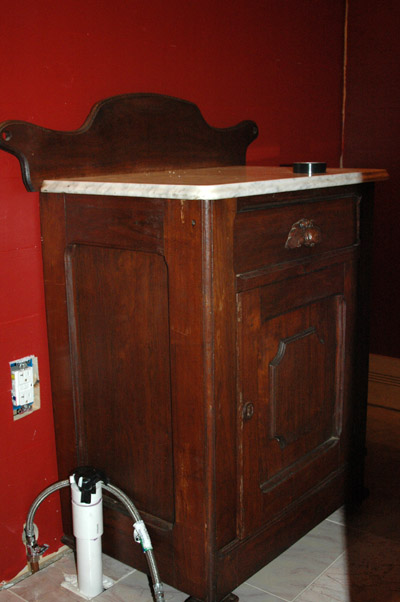
3/3/2008 - Here's the bathroom so far! Jeff did a wonderful job of creating our new sink!


6/1/09 - Here is a picture of Ivey's room. I think it makes a gorgeous nursery!


Here are also some pictures of the half bath:

